What are the 6 widely used temperature sensors?
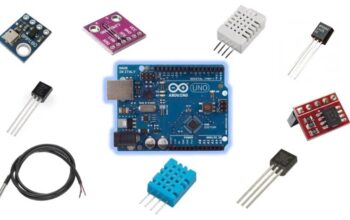
There are various types of temperature sensors corresponding to Arduino ESP32, ESP8266, and other development boards. So it is hard to select the most appropriate sensor for the project. In this article, we are comparing 6 mainly used temperature sensors. DHT11, DHT22, LM35, DS18B20, BME280, and BMP180
We are comparing all sensors when coming to the term of communication protocol, temperature range, accuracy, usage, and many more things.
We are running a simple experiment in which we measure the temperature in the same environmental conditions using the temperature sensors with time. By doing this experiment we can check how the sensor reacts to the temperature variations. We have tested this experiment for nearly 36 hours and we are giving you more results in the article.
Comparing Temperature Sensors: DHT11 vs DHT22 vs LM35 vs DS18B20 vs BME280 vs BMP180
To make a quick comparison of the sensors, we put together the below table that depicts the very important information when choosing the sensor called: communication protocol, supply voltage, temperature range, and accuracy.
DHT11 vs DHT22 (AM2302)
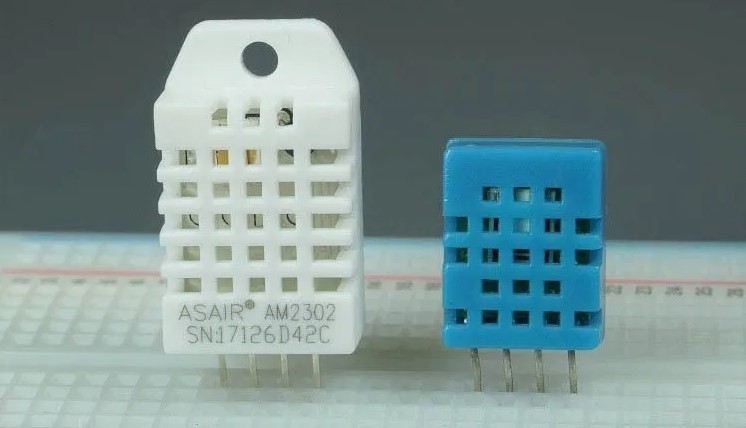
The DHT11 and the DHT22 (AM2302) are digital temperature sensors that check the temperature and the moisture condition. They seem to be very same and function in the same way but have got various specs.
Both of the sensors can be powered by 3.3V or 5V. So it is very easy to use them in your Arduino or ESP projects.
The DHT22 sensor comes with a good resolution and a broad temperature and humidity measuring range. However, it is a little bit expensive and only able to get readings at 2 seconds intervals.
The DHT11 is somewhat cheaper and has a smaller range. And also less accurate. But you are able to get the sensor recodes every second.
Unless the differences, they function according to a similar pattern And are able to use the same code to check temperature and humidity. You only have to select the code that is the same as the sensor type you have been using.
LM35, LM335, and LM34
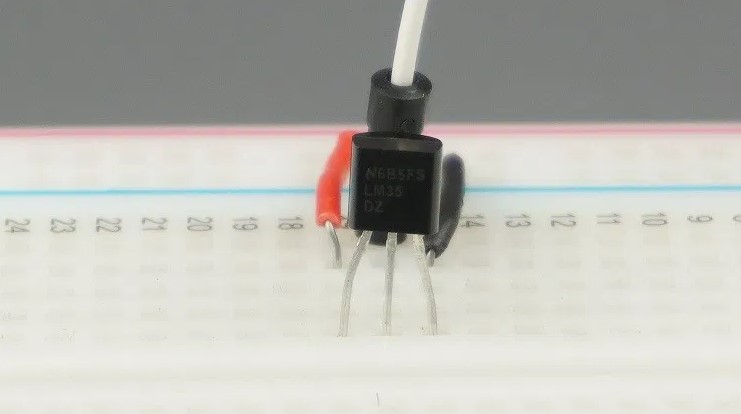
The LM35, LM335, and LM34 are straight temperature sensors that give a voltage corresponding to the temperature values. The LM35 is gauged in Celsius degrees. The LM335 in Kelvin and the LM34 in Fahrenheit. So according to the temperature units that you are using in the projects, the sensors will be more practical than the others.
We are recommending you to use the LM35 or LM34 instead of the LM335, as taking off a large number of the LM335 measurements to convert the temperature from Kelvin can understand the result’s accuracy.
Considering the datasheet, the LM35 and LM34 sensors need very little current to function like 60uA. This results in low self-heating like 0.08ºC, which means the temperature measurements will not get affected by the sensor.
To read the temperature from the sensors you have to read the sensor’s output voltage with the analog pin. If it is an Arduino, you have to use the analogRead() function and receive the temperature readings with two decimal points.
If you need a cheap and easy usable sensor to check the temperature, select the LM35. It consumes a little energy and is very suitable for portable projects that require low power consumption.
DS18B20 Temperature Sensor
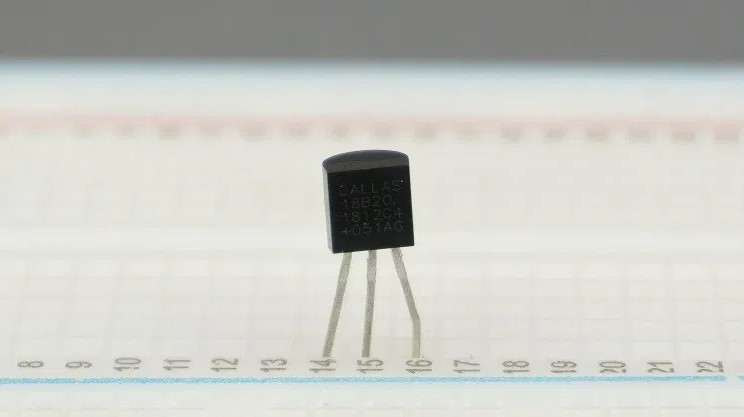
The DS18B20 Temperature Sensor is a digital temperature sensor with one wire. This conveys that it needs one data line to connect with the microcontrollers.
It is able to be powered externally or get power from the data line. It is called parasite mode. This removes the need for an external power supply.
Each of the DS18B20 temperature sensors has a unique 64-bit serial code. This lets you connect many sensors to the same data wire. So you are able to get temperature from various sensors with a single GPIO.
Moreover, the resolution of the sensor can be put to 9, 10, 11, or 12 bits which keep in touch to increments of 0.5°C, 0.25°C, 0.125°C, and 0.0625°C. The default resolution power is 12 bits.
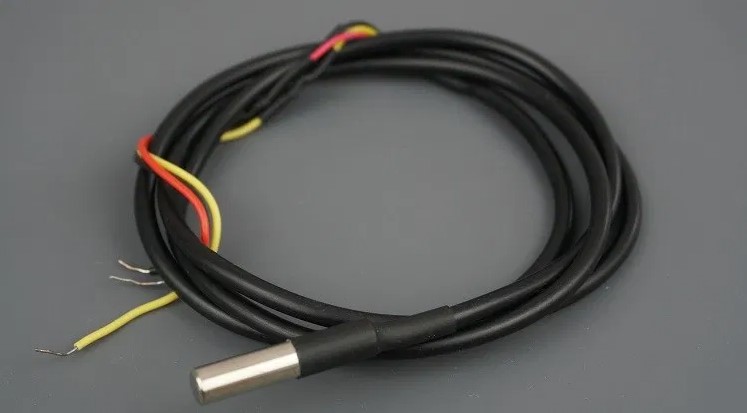
There are waterproof versions of the DS18B20 temperature sensor. Best for outdoor projects or to check the liquid temperature.
You can refer to our guide to learn how to use the DS18B20 temperature sensor with the ESP32, ESP8266, and Arduino with the Arduino IDE or the MicroPython:
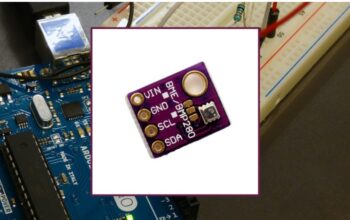
BME280 vs BMP180
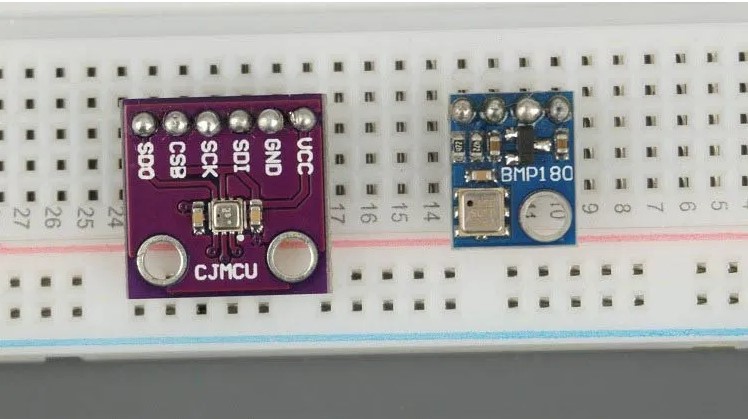
The BME280 and BMP180 are pressure indicators which means they record the atmospheric pressures. The BME280 is coming with the temperature and humidity sensor and the BME180 with a temperature sensor. The thing is pressure depends on the elevation. These sensors are also taken to check the elevation.
When coming to the temperature range, the BME280 has a large measurement range like -40 to 85ºC, meanwhile the BMP180 measures from 0 to 65ºC. You should note that the BME280 model heats it a self little bit. Therefore the measurements of the temperature will be 1 or 2 degrees above the exact temperature values.
The BME280 is able to use either 12C or SPI communication protocol while the BMP180 only uses the 12C communication.
The BME280 sensor is very expensive but made with many functionalities. As an example, you are building a weather station project using only this sensor. But if you do not like to measure the pressure or the humidity, you can receive a cheaper temperature sensor.
Cooperating the sensors with Arduino, ESP8266, and ESP32 is very simple thanks to the Adafruit libraries.
Testing All Temperature Sensors
This investigation gathered temperature recorded from various temperature sensors over the time in same contexts.
The data was entered into a microSD card with a microSD card module. The test continues for nearly 36 hours and temperature records were given every 5 minutes.
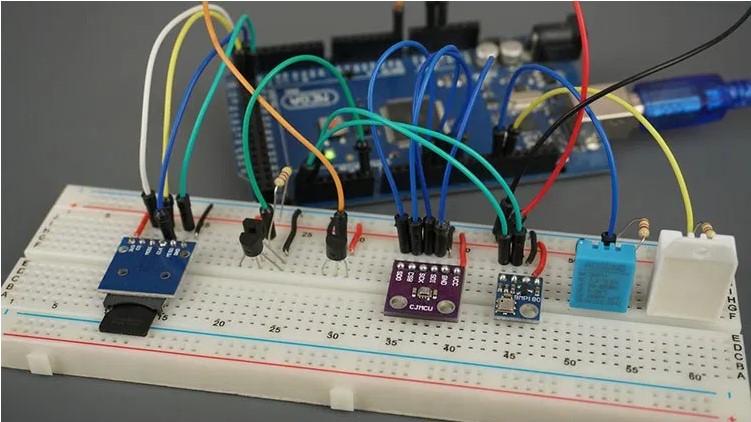
We linked the data pins of the temperature sensors to the below pins on Arduino Mega.
- DHT11: Pin 11
- DHT22: Pin 12
- DS18B20: Pin 14
- LM35: Pin A0
BME280: the software SPI on pins: Pin 4 (MISO), Pin 5 (CS), Pin 6 (SCK), Pin 7 (MOSI).
BMP180: Pin 20 (SDA) and Pin 21 (CSL)
The microSD card was linked using the hardware SPI: Pin 51 (MOSI), Pin 50 (MISO), Pin 52 (SCK), and Pin 53 (CS).
Results: Comparing Temperature Readings
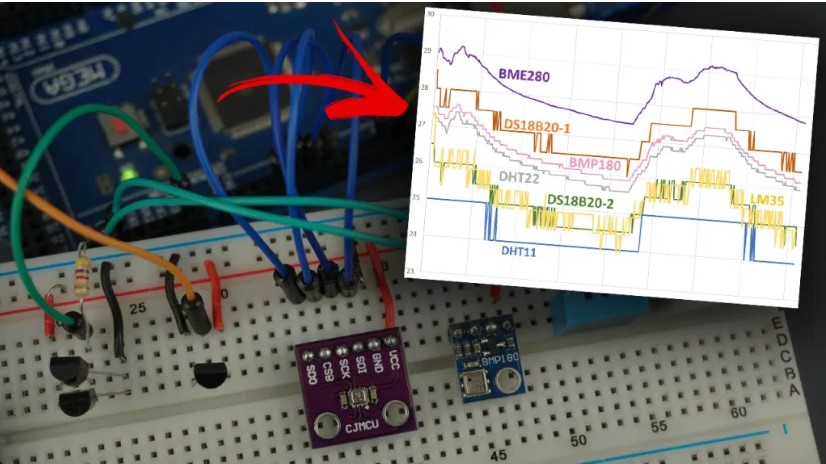
After around 36 hours, we removed the microSD card and took the results into a spreadsheet. We have marked all the readings for the best comparing measurements from various temperature sensors.
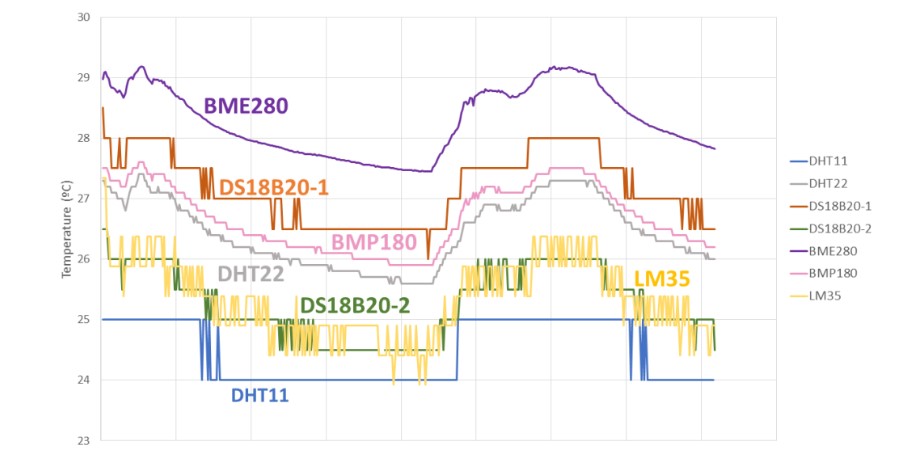
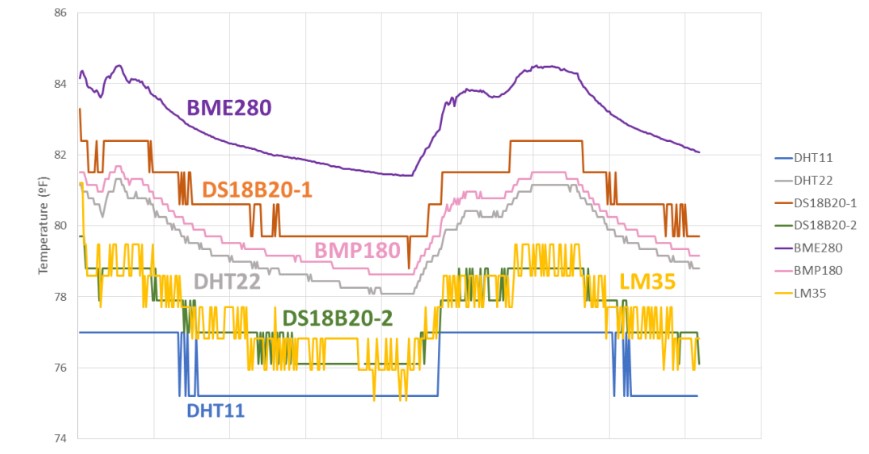
This chart does not belong to a controlling section as we have not used a calibrated temperature sensor. Anyhow, we have got an idea of how the sensors function.
If you have a look at the charts, the BME280 measures nearly higher values than the rest of the temperature sensors. This functioning is normal and explained in the datasheet. This model hetas itself and the temperature counts can be I or 2 degrees above the true temperature value.
Anyhow, the BME280 is also a temperature sensor that provides more static temperature records without too much swinging between the readings. It can recognize the changes up to 0.01ºC.
If the DS18B20 temperature sensors, we can see some fluctuation in the readings and they highlighted that resolution is not good as the BME280. Moreover, the DS18B20 temperature sensor only gave null values within the experiment. We have checked two DS18B20 temperature sensors in the same data range and one of them failed to get the temperature 6 times in the whole experiment.
The DHT22 and the BMP180 function similarly with the variations. The DHT11 could not recognize small temperature differences, because of the 1ºC resolution.
At last, the LM35 temperature sensor catches the changes in temperature between btween 24ºC and 26ºC but with many changes in measurements.
The chart compares the range of different temperature sensors showing how the sensors become different from others. It is easy to understand how they function and if they are appropriate for the project that you are building.
Wrapping Up
In this article, we have talked about some temperature sensors that can be used with the ESP32, ESP8266, Arduino, and other developing boards. These sensors check all temperatures but act differently when testing them in the same environment simultaneously.
We think this article will be very helpful for you. This will support you to have the best suitable temperature for your projects.
Frequently asked questions
How does a Wi-Fi temperature sensor work?
As their name shows, contact-type sensors work by making actual physical touch with the thing being sensed. Conductivity is used by them to detect and track temperature changes. Non-Contact Type Sensors track temperature changes by means of convection and radiation.
How many sensors can Arduino Uno handle?
The microcontroller’s two I/O pins will be used by the separate trigger and echo pins in this mode. This is true, but when numerous sensors are used at once, availability concerns could occur. On the Arduino UNO, a total of 7 sensors could be used in this mode.
What is the most accurate temperature probe?
Since 2015, the ThermoWorks ThermoPop has been the top choice as it monitors temperatures rapidly and precisely and is very affordable. The ThermoPop reached most cooking temperatures within 1 degree in less than 4 seconds.
Recommendations:
Using BME680 Environmental Sensor with Arduino
MPU-6050 Accelerometer and Gyroscope Sensors
BH1750 Ambient Light Sensor with Arduino