Using BME280 Sensor with Arduino
This guide shows you how to use the BME280 sensor model with Arduino to get the pressure, temperature moisture, and check altitude. We are guiding you to wire the sensor, install the essential libraries and write a simple draft to show the sensor outputs.
Introducing BME280 Sensor Module
The BME280 sensor module reads pressure indicators, temperature, and humidity. The thing is pressure varies with the altitude, and even you can guess the altitude. There are various versions of this kind of sensor. The BME280 sensor uses the 12C or SPI communicating agreement to exchange data with a microcontroller.
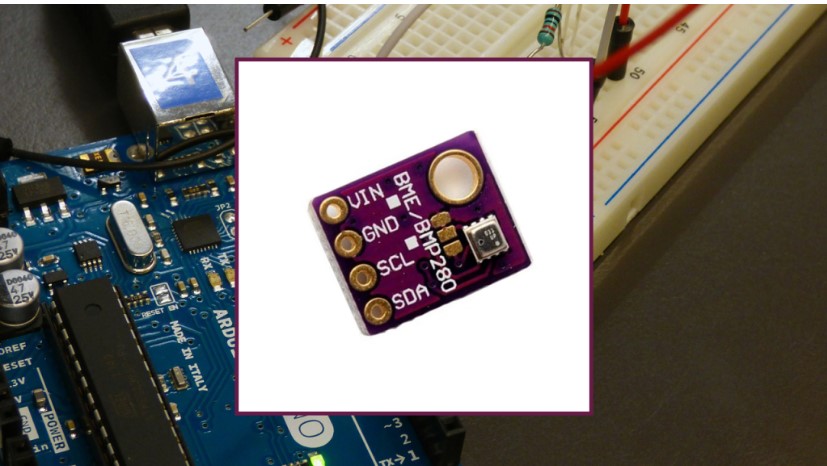
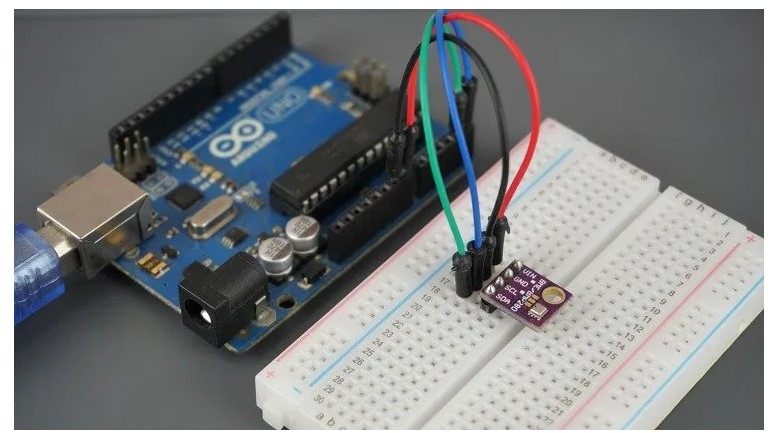
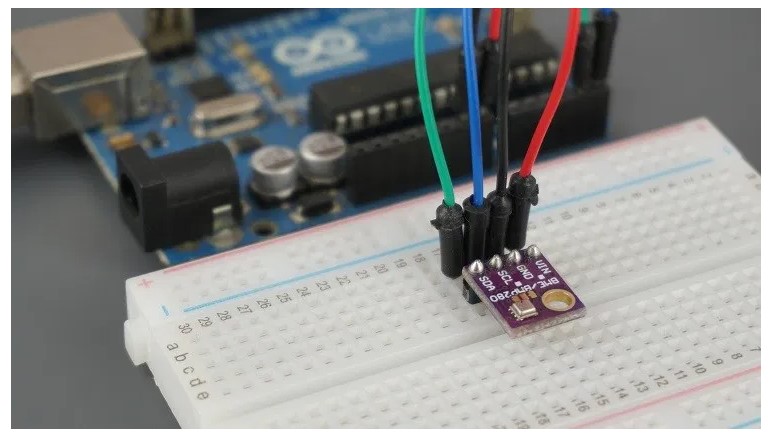
We use the module shown in the below picture.
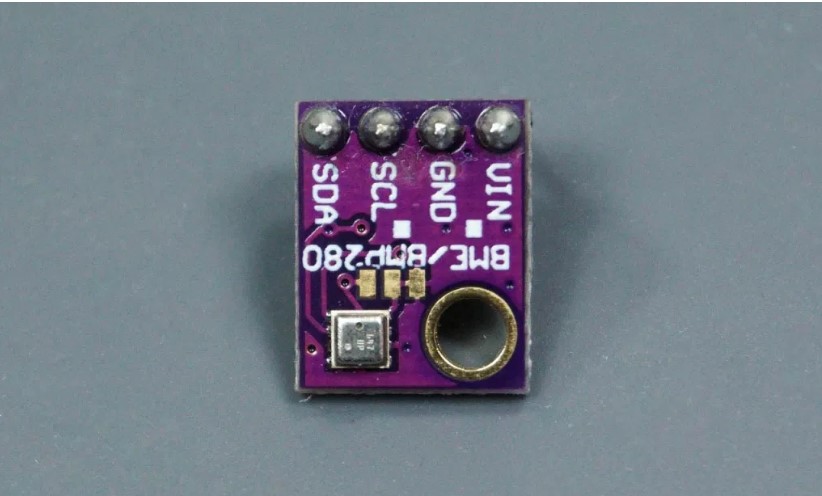
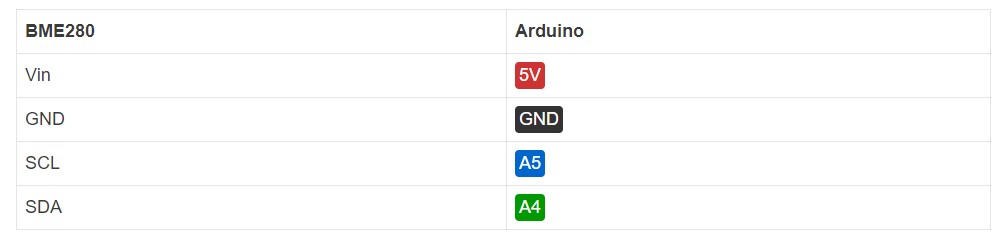
This sensor transfers using the 12C communication protocols so very easy to wire them. Connect the BME280 sensor to the Arduino Uno 12C pins like the below table.
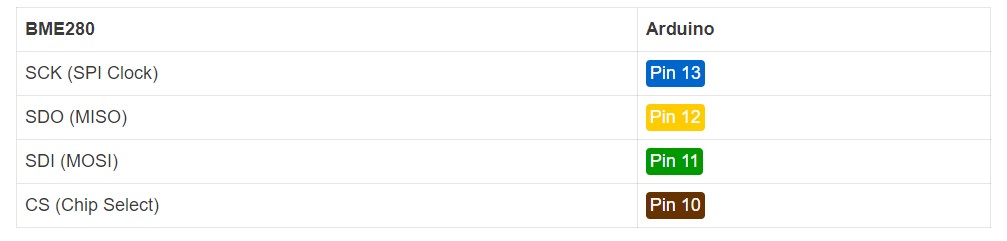
There are other versions of this sensor that use both the SPI or 12C communicating protocols like the below shows module.

If you use any of these sensors, for using the 12C communication protocol, has the below-given pins.

If you are using the SPI communication protocol, use the below-mentioned pins.
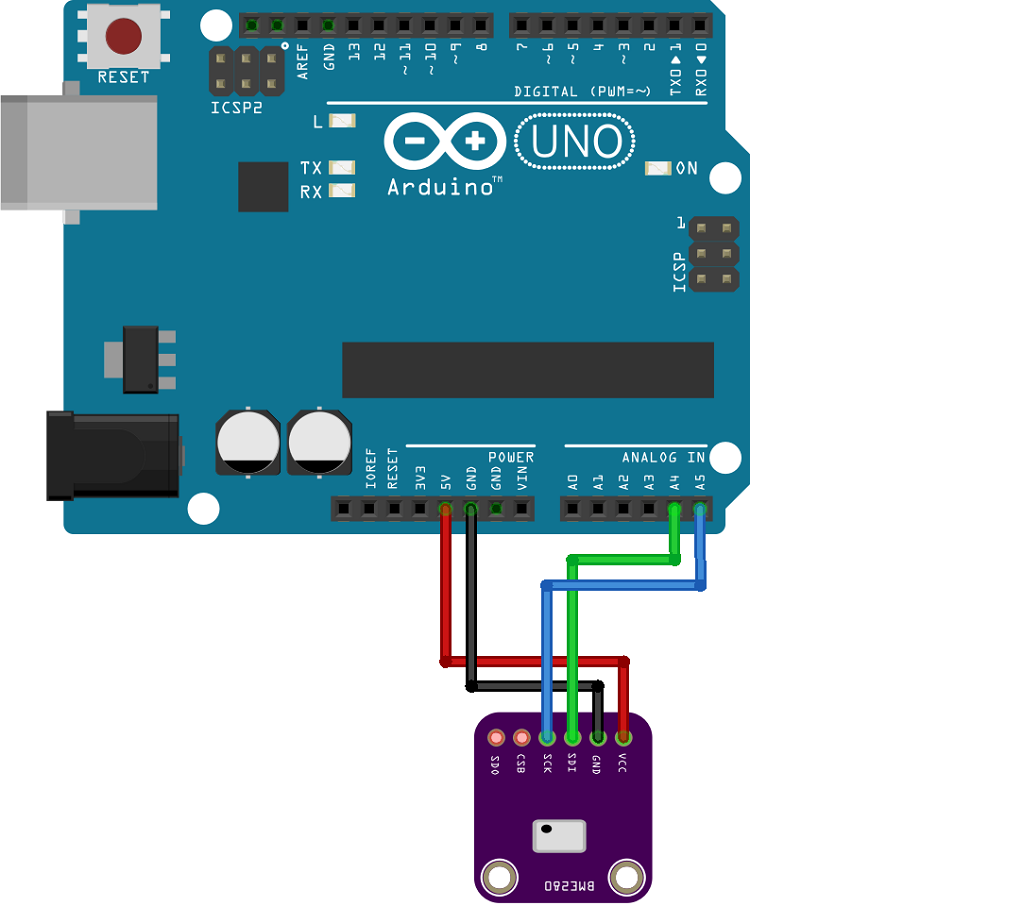
Schematic
Link the BME280 sensor to the Arduino board like the below given schematic diagram.
Installing the BME280 library
To receive the readings from the BME280 sensor you have to use the Adafruit_BME280 library. Follow the next steps to install the library in the Arduino IDE.
Open the Arduino IDE and head to Sketch > Include Library > Manage Libraries. The Library manager will open.
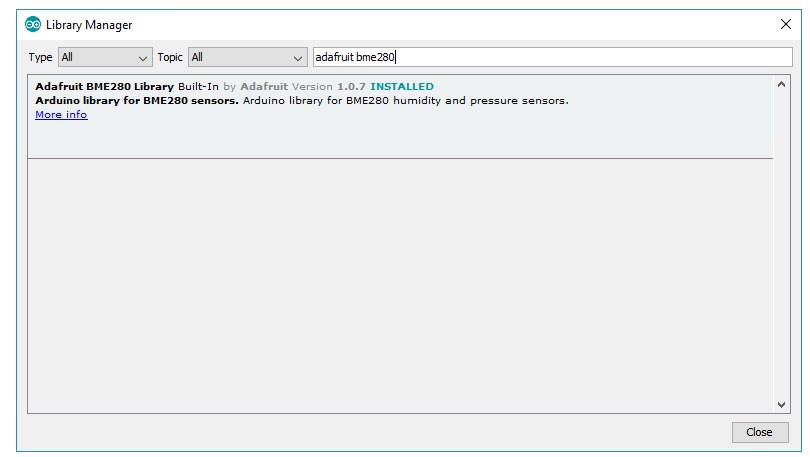
Find the “adafruit bme280 ” on the search box and install the library.
Installing the Adafruit_Sensor library
For using the BME280 library, install the Adafruit_Sensor library. Follow the given steps to install the Arduino IDE.
Head to Sketch > Include Library > Manage Libraries and enter “Adafruit Unified Sensor” in the search box. Scroll down and find the library and install it.
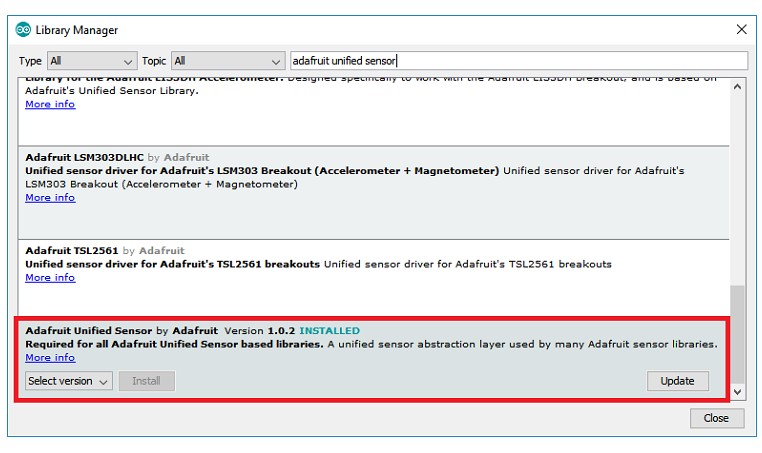
After installing restart the Arduino IDE.
Reading Pressure, Temperature, and Humidity
For reading the pressure, temperature and moisture we are using a rough example from the library.
After the BME280 library installation, and the Adafruit_Sensor library, open the Arduino IDE and head to File > Examples > Adafruit BME280 library > bme280 test.
Libraries
The code begins with the essential libraries: the wire library to use 12C and the Adafruit_Sensor and Adafruit_BME280 libraries to join with the BME280 sensor.
#include <Wire.h>
#include <Adafruit_Sensor.h>
#include <Adafruit_BME280.h>
SPI communication
As we use the 12C communication, the below lines define the SPI pins are commented.
/*#define BME_SCK 13
#define BME_MISO 12
#define BME_MOSI 11
#define BME_CS 10*/
Sea level pressure
A varivle named as SEALEVELPRESSURE_HPA is made.
#define SEALEVELPRESSURE_HPA (1013.25)
This parameter stores the pressure in hectopascals at sea level (is equivalent to millibar). By comparing it to the pressure at sea level, this variable can be used to calculate the altitude for a given pressure. The default number is used in this example, but for more precise results, you should replace the local sea level pressure.
I2C
By default, this used the 12C communication protocol. As you see just need to create an Adafruit_BME280 object called bme
Adafruit_BME280 bme; // I2C
To use, the SPI comments on the previous code and uncomments the below code.
//Adafruit_BME280 bme(BME_CS); // hardware SPI
//Adafruit_BME280 bme(BME_CS, BME_MOSI, BME_MISO, BME_SCK); // software SPI
setup()
In the setup(), start the serial communication.
Serial.begin(9600);
And the sensor is formatted:
status = bme.begin();
if (!status) { Serial.println(“Could not find a valid BME280 sensor, check wiring!”);
while (1);
}
Printing values
In the loop() the printValues() functions read the values from BME280 and give the results in the serial monitor
void loop()
{ printValues();
delay(delayTime);
}
Reading temperature, humidity, pressure, and guessing the altitude is easy as using the below methods with bme object.
- bme.readTemperature() – reads temperature in Celsius;
- bme.readHumidity() – reads absolute humidity;
- bme.readPressure() – reads pressure in hPa (hectoPascal = millibar);
- bme.readAltitude(SEALEVELPRESSURE_HPA)
- Guess the altitude in meters according to the pressure at sea level.
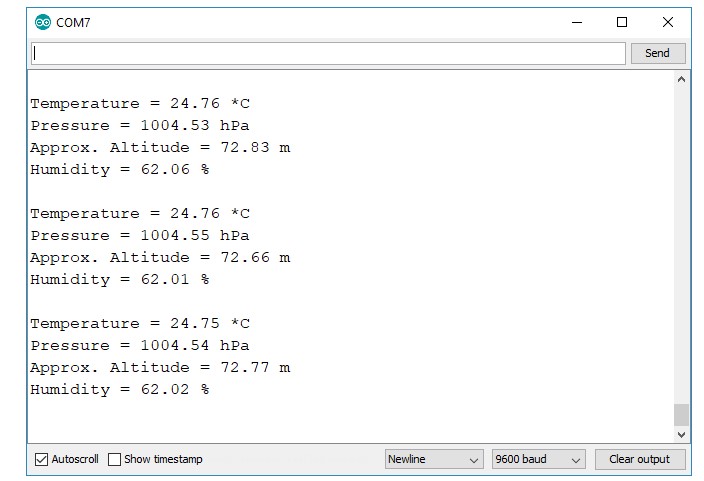
Demonstration
Upload the code to the Arduino.
Check the outputs on the Serial Monitor.
Wrapping Up
The BME280 offers a quick and affordable way to measure pressure, temperature, and humidity. Since the sensor uses the I2C protocol for communication, wiring it up is fairly straightforward—you simply attach the sensor to the Arduino’s I2C pins.
Writing the code to have the sensor readings is very simple because of the BME280_Adafruit library. You only have to use the readTemperature(), readHumidity() and readPressure() methods. You can also guess the altitude with the help of the readAltitude() method.
Frequently asked questions
How does the BME280 measure pressure?
The Arduino conveniently gives the 3.3V or 5V that the sensor requires. Here is how this sensor appears. Utilizing silicon and germanium’s piezo-resistive properties, the BME280 monitors pressure.
What is the difference between BMP180 and BMP280?
As barometer sensors, the BME280 and BMP180 measure air pressure. A temperature and humidity sensor has got the BME280, while a temperature sensor is included in the BMP180. These sensors can also be used to calculate altitude because pressure changes with altitude.
What is a temperature and humidity sensor?
A thermo-hygrometer is a tool that measures both the temperature and humidity of a location. In industries where temperature and humidity are crucial, such as breweries and disquiet units, drug setups, and plant growth chambers. In this case, they prove to be quite useful.
Recommendations:
LM35, LM335, and LM34 Temperature Sensors
9 Arduino Compatible Temperature Sensors
What are the 6 widely used temperature sensors?