
Sporadic Wi-Fi? Windows will automatically connect to the Wi-Fi Network with the strongest signal if you let it do all the work for you.
How near your connected device is to the wireless router determines the strength of your wireless connection. The signal your gadget receives becomes weaker as you travel deeper. Windows may set up to automatically connect to the strongest Wi-Fi network if your house or workplace has many network devices.
You must set up the characteristics of your local network card in order to accomplish this. If not, you may configure network priority in Windows by using a third-party Wi-Fi network management tool.
How to Set Wi-Fi Network Properties by Configuring Network Adapter Properties
An attribute of network cards is roaming aggression. It alters the point at which your Wi-Fi adapter begins seeking for another Wi-Fi network device when you update its settings.
Even though the signal is strong, if the value is set too high, it will leap. When the Wi-Fi adaptor is on its lowest setting, it could wait until the signal is too weak before scanning for another network.
On your Windows machine, the roaming aggressiveness setting is by default set to Medium. To connect Windows to the strongest Wi-Fi network in the neighborhood, adjust it and set it to the maximum setting.
To modify the value for roaming aggression:
- Open Run by pressing Win + R.
- To launch the Control Panel, enter control and press OK.
- Then select Network and Sharing Center by clicking Network and Internet.
- Click Change adapter settings in the left pane.
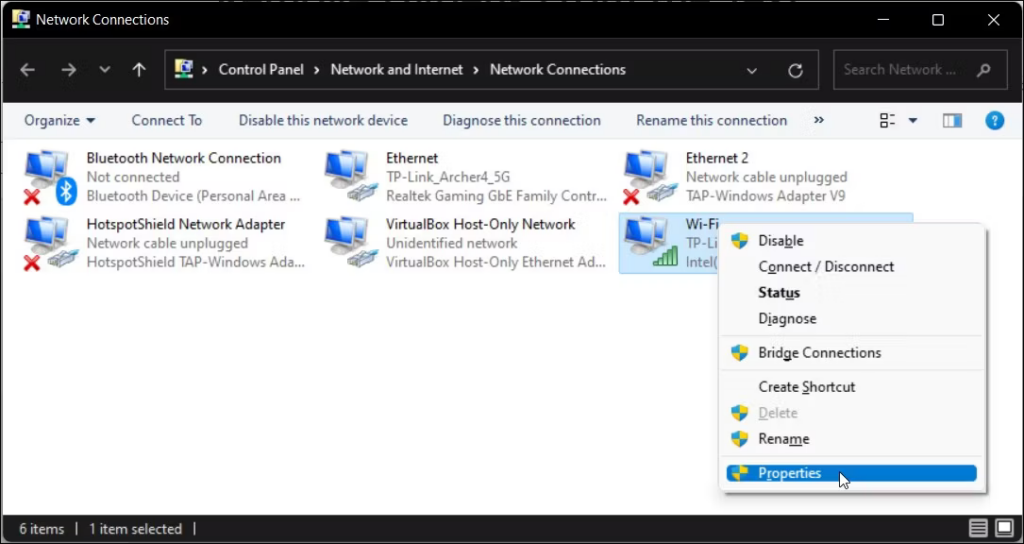
- Right-click your Wi-Fi adapter that is now active here and choose Properties.
- Click the Configure button in the Properties window.
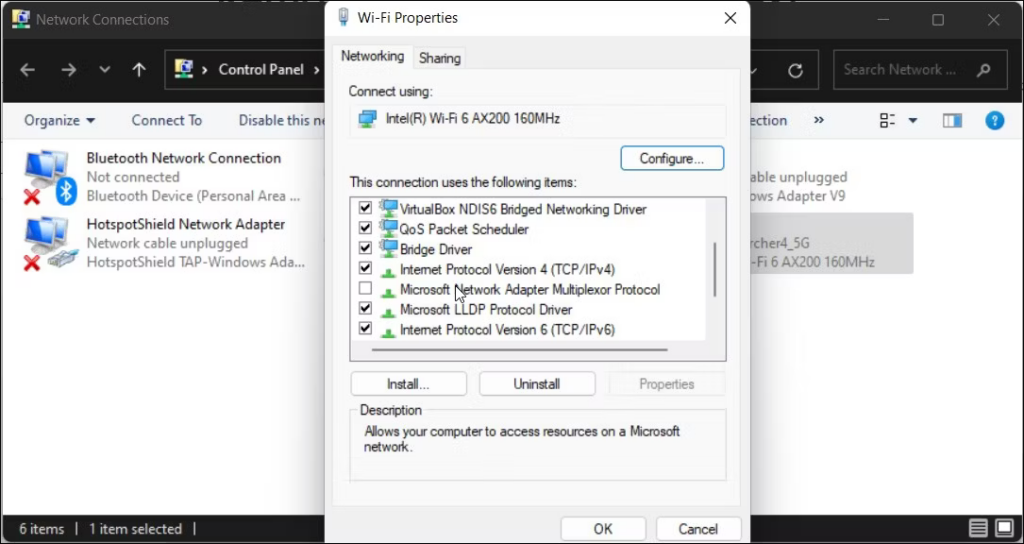
- Open the Advanced tab in the new window.
- Locate and choose Roaming Aggressiveness under the Property section.
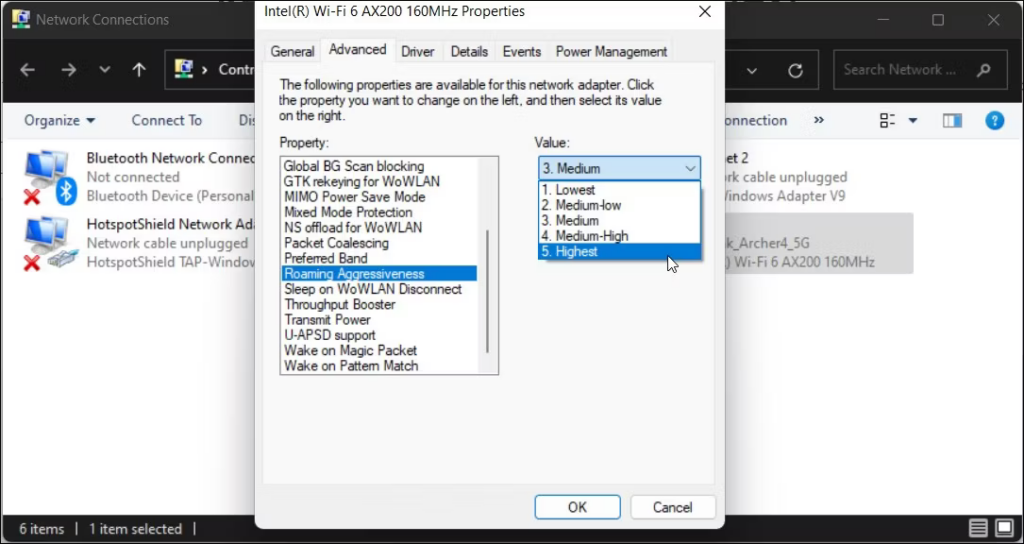
- The Roaming Aggressiveness parameter is by default set to Medium. Select 5 from the drop-down menu by clicking it.
- To save the changes, click OK.
How to Set Wi-Fi Network Properties by Configuring Network Adapter Properties cont’d
Shut down all open windows and restart your computer. You must set up your computer to search for alternative networks while connected to the present network after the restart. This is the procedure.
- Open Run by pressing Win + R.
- The Network Connections dialog will appear after you type ncpa.cpl and press OK.
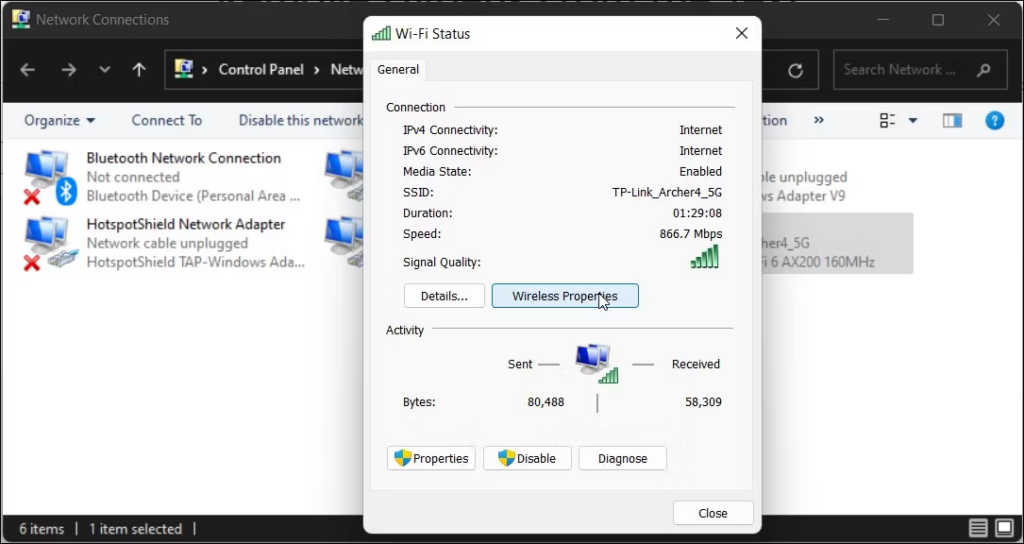
- Select Status by right-clicking on your Wi-Fi adapter.
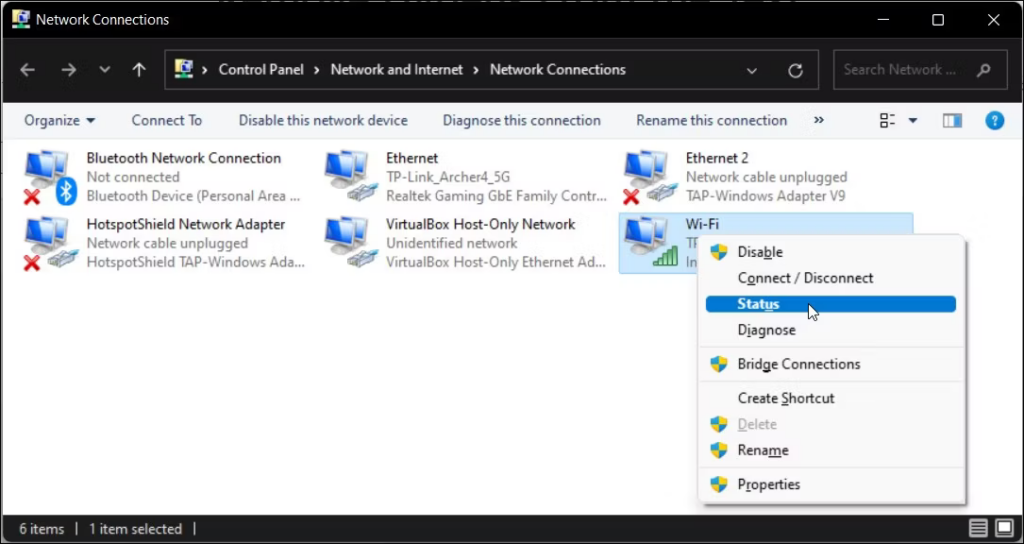
- Click Wireless Properties next.
- Check the box next to “Look for alternative wireless networks while connected to this network” in the Properties dialog.
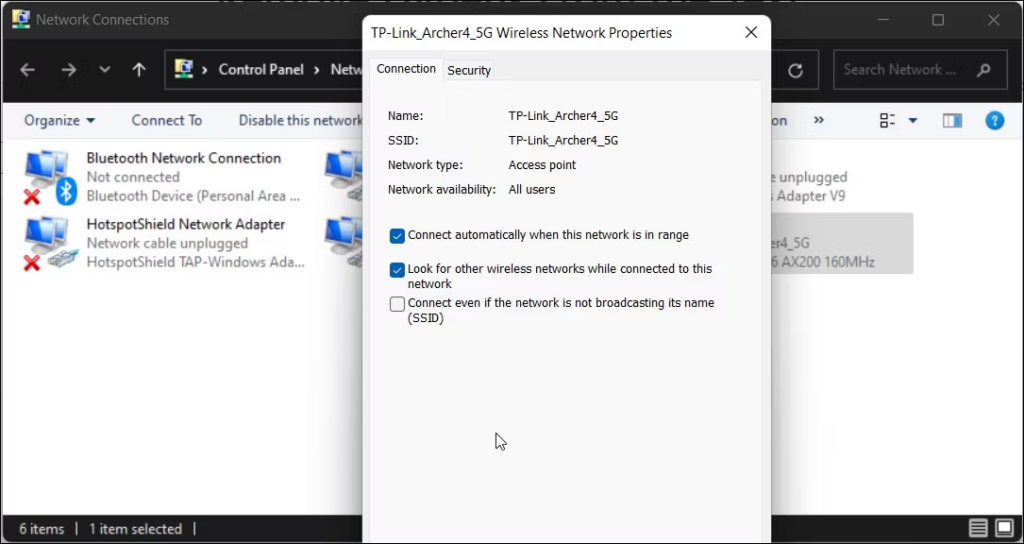
- To save the changes, click OK.
When this is recognize, your computer will connect to the following strongest Wi-Fi network.
Even if you only travel a small bit, you can experience numerous network hops since we have set the roaming aggressiveness to its highest setting.
In such scenario, try out several Roaming Aggressiveness settings until you discover one that suits you the most. Choose the value 3.Medium in the network settings to return to the default option.
How to Automatically Switch Between the Best Wi-Fi Networks Using Wifinian
A third-party Windows tool called Wifinian enables you to actively manage your Wi-Fi connections. It has a straightforward user interface and a few helpful features.
You may set up auto-connection and auto-switch for your Wi-Fi networks using the app. Additionally, you may run a scan, carry out an automated connection based on the strength of the signal, and set up a priority-based wireless profile.
To automatically choose between the top Wi-Fi networks using Wifinian:
- Navigate to the Microsoft Store’s Wifinian page.
- To download and set up the application, click Get This App.
- The taskbar will display it after it has been installed.
- To open the application, click the Wifinian icon.

- All the Wi-Fi profiles that are accessible will be instantly scanned and displayed.
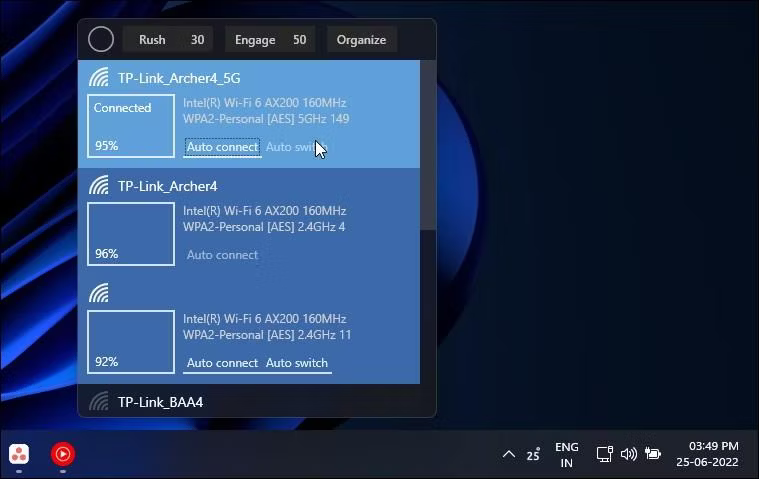
To enable the app to automatically select and connect to the strongest Wi-Fi network when available, click Auto Connect and then Auto Switch.
Connect Windows automatically to the Strongest Wi-Fi Network
Your Windows device may be connect to the most reliable wireless network at home and at work using roaming aggressiveness. However, you may use the Wifinian app to automate this procedure, albeit with less control, if you don’t want to walk through the network parameters each time to change the wireless aggressiveness.
Frequently Asked Questions
1. How can I get Windows to automatically choose the fastest Wi-Fi?
Select Properties by performing a right-click on the built-in WiFi adaptor. Step 4: Select the Advanced tab in the WiFi Properties dialogue box. Click Roaming Aggressiveness in the Property list at this point. Next, choose the highest option from the drop-down menu next to the Value box on the right side of the Property list.
2. Why doesn’t my computer receive the full internet speed?
Although spyware, viruses, and the amount of RAM your computer has, as well as the programs that are running, can all slow down your Internet connection, they are not the only culprits. Spyware and viruses are two of the most prevalent reasons for sluggish Internet performance.
3. How can I get around the speed throttling?
What is the most effective workaround for bandwidth throttling? The simplest approach is to connect using VPN if your ISP is restricting your bandwidth and switching providers is not an option. The data packets won’t be able to be examined by your ISP, therefore it won’t be able to limit that traffic based on the service you’re using.
Editor’s choice:
9 Fixes for the “No Internet Secured” Error on Windows 10
How to Fix a Persistent “Enter Network Credentials” Message on Windows