LM35, LM335, and LM34 Temperature Sensors
This guide tells you how to use the LM35 (LM35DZ), LM335, and LM34 temperature sensors with the Arduino board. You can learn how to link the sensors and write the code to have temperature readings. At last, we are building a sample project to show the sensor readings on an OLED display.
Introducing LM35, LM335, and LM34 Temperature Sensors
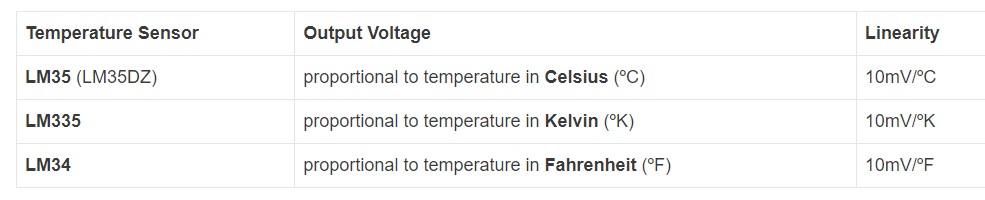
The LM35, LM335, and LM34 are direct temperature sensors that give the voltage correspondent to the temperature value.
These sensors function in a similar pattern but are gauged to give the voltage correspondent to the various temperature units.
The LM35 shows the 10 mV per degree Celsius rise in temperature. Similarly, the LM35 gives a 10 mV per degrees Kelvin rise in temperature, and the LM34 outputs a 10mV per degree Fahrenheit rise in temperature.
As an example, if the LM35 gives a voltage of 345 mV, it means we gain a value of 34.5ºC.
LM35 (LM35DZ) Pinout
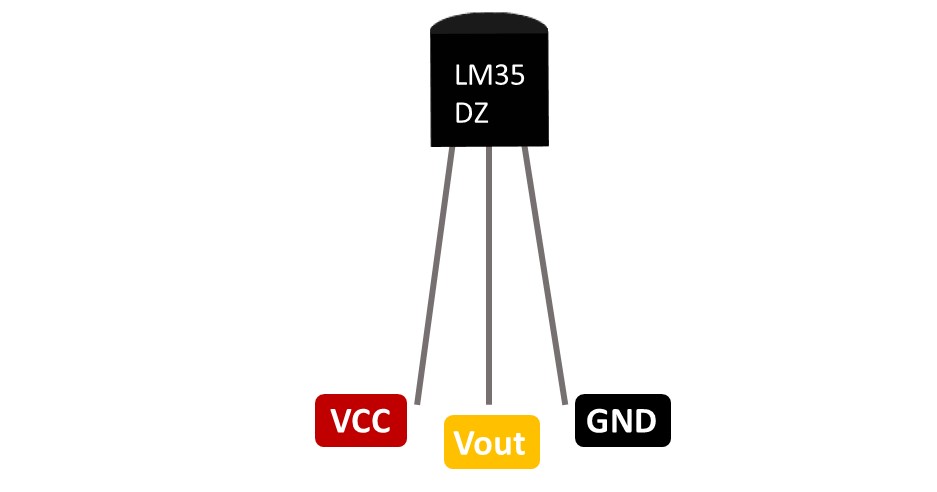
The LM35 comes with only three pins, VCC, Vout, and GND.
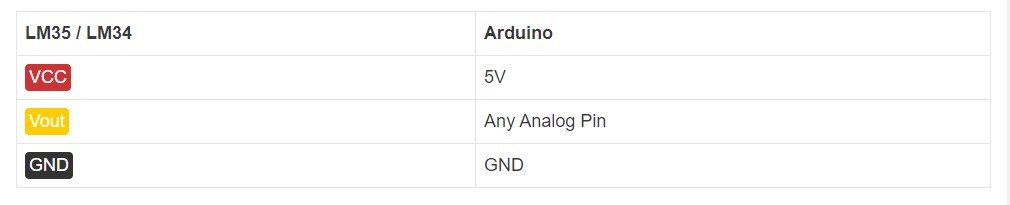
There is a connection you have to make between the LM35 and the Arduino.
Note that LM34 temperature has the same pinout as LM35.
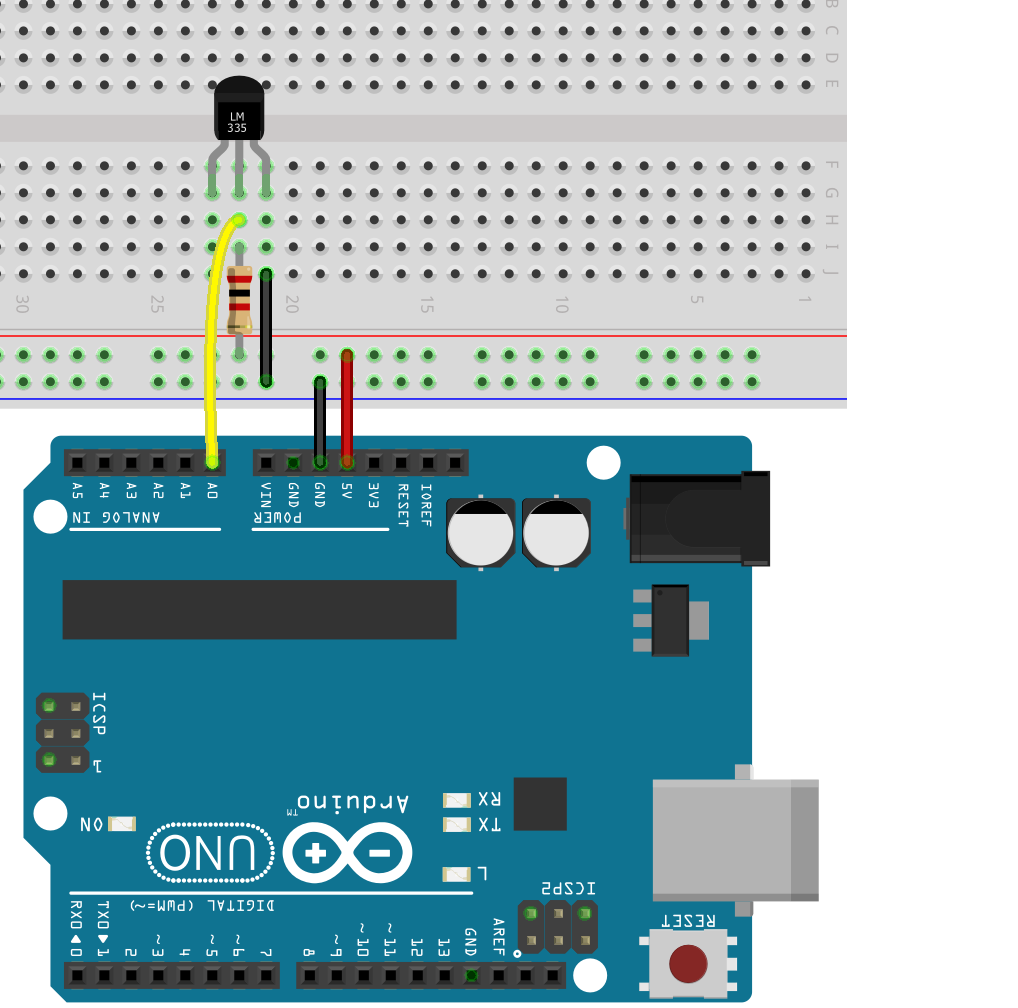
LM335 Pinout
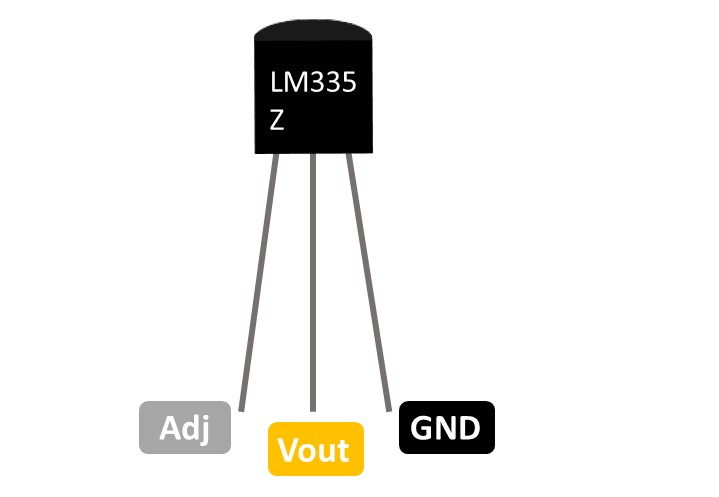
The pinout of the LM335 temperature sensor is a little bit different.
The adj pin is used to measure the sensor and get the correct temperature outputs. We are not using that pin in this tutorial so keep it unconnected.
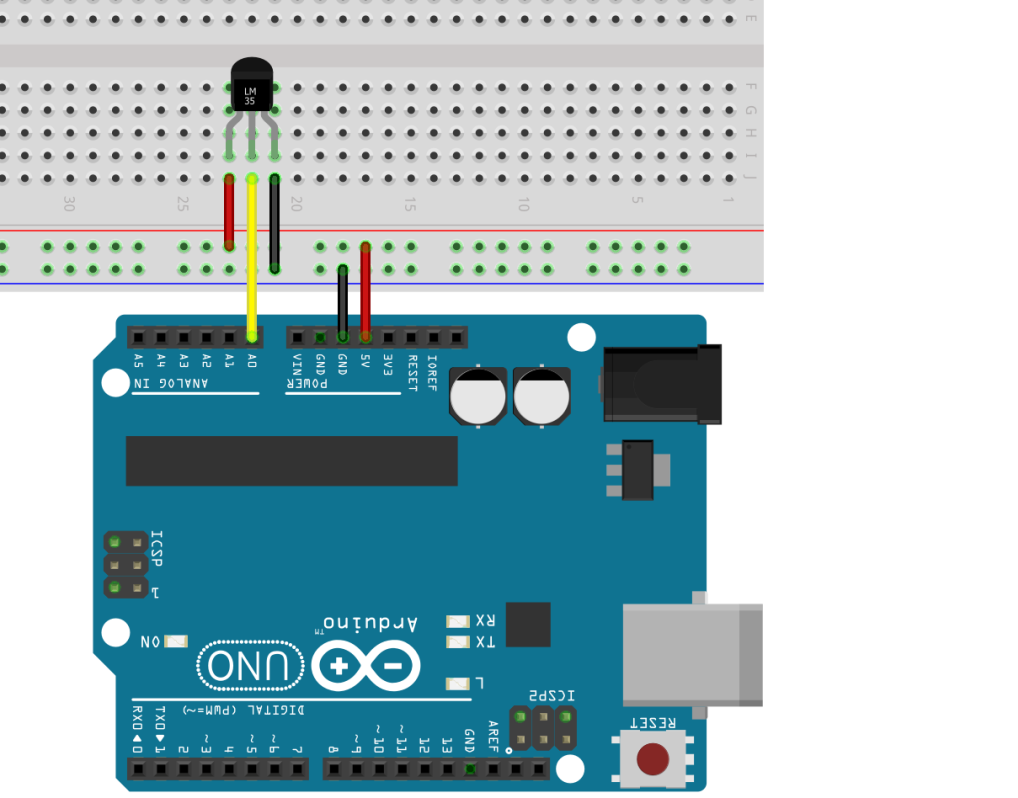
Schematic Diagram
You have to follow the same picture diagram if it is an LM35 or LM34 temperature sensor. If it is an LM335 diagram you’re using do some slight differences.
LM35 and LM34 with Arduino
LM335 with Arduino
Code – Read Temperature
The below code reads the temperature from the LM35 sensor and shows the reading d in the Serial monitor. This code is also suitable for LM335 and LM34. You just have to uncomment some lines in the code for using the correct sensor.
How the Code Works
Start by marking the pin connected to the sensor output. It has to be an analog pin. We use the A0 pin, but you have the chance to use any other analog pin.
const int sensorPin = A0;
Make a variable that holds the analog value got from the sensor.
float sensorValue;
The voltageOut variable stores the ral voltage output value that comes from the sensor.
float voltageOut;
Next, make the variable that stores the temperature values. Here we make the temperature and a temperature variable to keep the temperature in Celcius and Fahrenheit accordingly.
float temperature;
float temperatureF;
If you use the LM335 sensor, then also need a variable to keep the temperature in Kelvin. So if you use the sensor you have to uncomment the below line.
//float temperatureK;
In the setup(), mention the senssorPin as an input. Edit a serial communication at a bandwidth of 9600. You have to edit the serial communication so you are able to show the readings on the serial monitor.
pinMode(sensorPin, INPUT);
In the loop(), read the value that comes from the sensor and save it in the voltageOut variable. To read the analog value with Arduino you have to use the analogRead() function and send the pin you need to read as an argument.
voltageOut = analogRead(sensorPin);
As said earlier, these sensors give out a voltage value that is corresponding to the temperature.
The analog values that are read from the Arduino have values between 0 and 1024, which o keep in touch with 0V and 1024 to 5V. Therefore we are able to get the output voltage of the sensor in mV.
voltageOut = (sensorValue * 5000) / 1024
Just in the case of the LM35 sensor, we know that 10mV links to a Celcius degree rise in temperature. So the temperature in celsius goes with the voltage read of the sensor in mV divided by 10mV.
temperatureC = voltageOut / 10;
Celcius to Fahrenheit conversion
To get the temperature in Fahrenheit, use the Celcius to Fahrenheit conversion.
The calculations to determine the temperature are the same if an LM335 or an LM34 is being used. Just keep in remember that the LM335 returns the temperature in Kelvin degrees, while the LM34 does it in Fahrenheit degrees. The values can then, be converted to other units if needed.
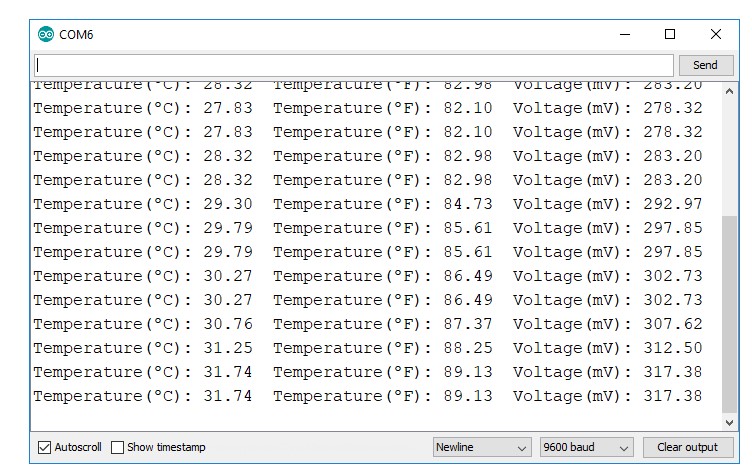
At last print the sensor readings to the Serial Monitor boh using Celcius and Fahrenheit degrees.
Serial.print(“Temperature(ºC): “);
Serial.print(temperatureC);
Serial.print(” Temperature(ºF): “);
Serial.print(temperatureF);
To debug we print the voltage.
Serial.print(” Voltage(mV): “);
Serial.println(voltageOut);
The loop() gets reported every second.
delay(1000);
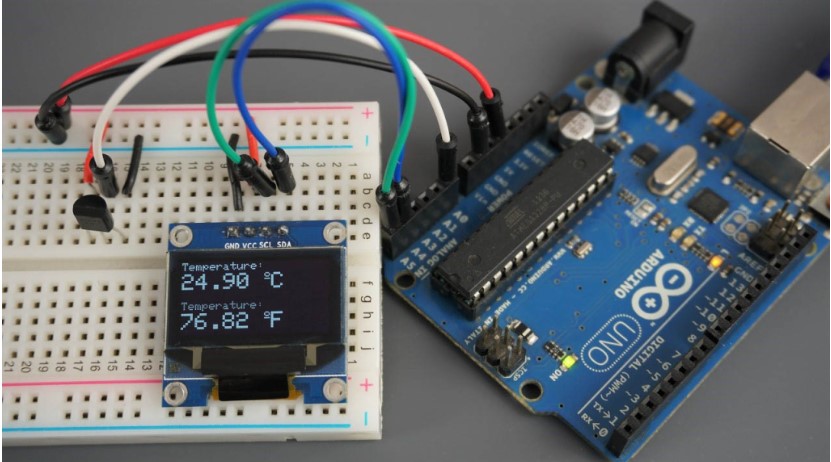
Demonstration
Upload the code to the Arduino IDE. Definitely select the correct board and COM port in the tools.
Open the Serial Monitor after that with a 9600 baud rate. Every second, you should receive a fresh temperature measurement. To watch the temperature values rising, cover the sensor with your finger.
Parts Required
For this project, you need the below parts.
- Arduino board (read Best Arduino Starter Kits)
- LM35 Temperature Sensor (or LM335, LM34)
- 2k Ohm resistor (if using an LM335)
- I2C OLED Display
- Jumper Wires
- Breadboard
Schematic Diagram
Link the all components as the schematic diagram.

Installing OLED Libraries
You require the adafruit SSD1306.h and adafruit GFX.h libraries to control the OLED display. To install those libraries, adhere to the steps that follow.
Launch the Arduino IDE and select Sketch > Include Library > Manage Libraries. Then the library manager will open.
Enter “SSD1306” in the search box and install the SSD1306 library from Adafruit.

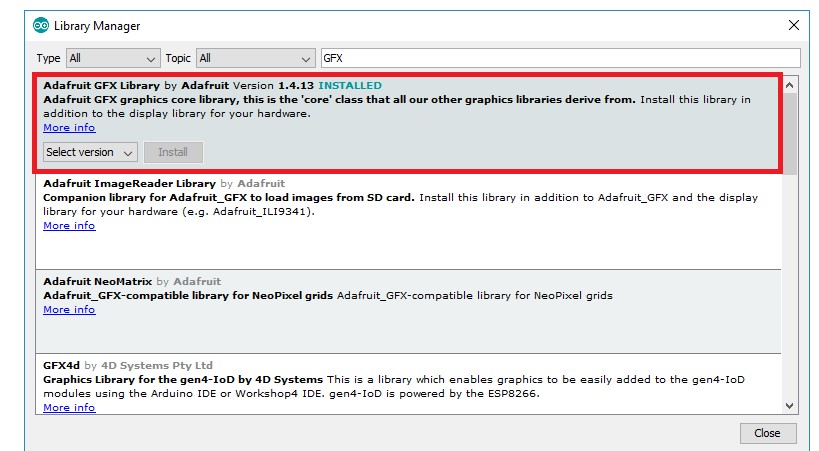
Enter “GFX” in the search box and install the library after installing the SSD1306 library from Adafruit.
Restart your Arduino IDE after installing the libraries.
Code – Display Readings on OLED
Upload the following code to your Arduino board after completing the circuit wiring and installing the necessary libraries.
Demonstration
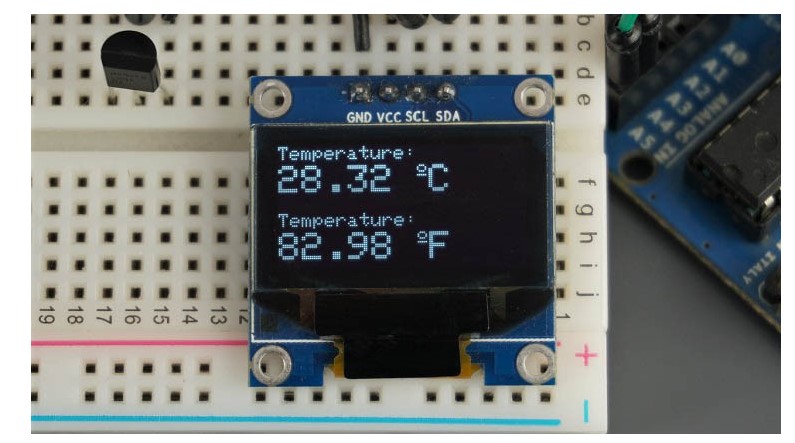
Congratulations! The project is finished. The sensor readings can now be verified in the OLED display. Every second, a new temperature reading is shown.
Wrapping Up
The linear temperature sensors LM35, LM335, and LM34 produce a voltage that is proportionate to the temperature value. They can be powered by the Arduino 5V pin, and an analog pin can be used to read the voltage.
Using the analogRead() method on the sensor pin to read the voltage from the sensor is a simple process. The temperature in your selected unit can then be obtained by doing a straightforward calculation.
Frequently asked questions
How do I connect my LM35?
Simply connect the left pin of the LM35 to power (4V to 30V) and the right pin to the ground to use it (assuming the flat side of the sensor is facing you). The analog voltage on the middle pin will thereafter be directly proportional (linear) to the temperature in degrees Celsius.
What is LM35 made of?
Both a plastic TO-220 packaging and an 8-lead surface-mount small-outline package are available for the LM35D device. The output voltage of the LM35 series precision integrated-circuit temperature sensors is linearly proportional to the temperature in degrees Celsius.
What is the difference between a thermistor and LM35?
Thermistors are less expensive and smaller, which is advantageous for situations where a large number of points must be sensed in a short space. Compared to the LM35, they have a broader temperature range. Due to the ability of many sensors to share a readout circuit, they only have two leads and use less power per sensor.
Recommendations:
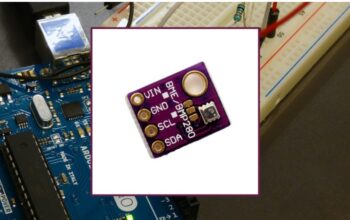
Using BME680 Environmental Sensor with Arduino
MPU-6050 Accelerometer and Gyroscope Sensors
The Ultrasonic Sensors HC-SR04 with Arduino